
How to Wax Eyebrows: The Step by Step Guide

If you're like all of us here, you want perfect eyebrows all the time. If shaped and trimmed properly, brows frame your face and give it a little extra structure and definition.
However, wanting the best brows can be easier said than done, especially if you don’t have the time or extra money to regularly visit the salon.
Though we of course always recommend going to the pros, it’s understandable that you might wonder how to wax eyebrows yourself to keep them looking their best without having to make that extra trip.
Table of Contents
If you're thinking, "I have my favorite esthetician I go to already! Why do I need to bother learning how to wax my own brows?", we get it, and we all prefer our few minutes of pampering and having someone else masterfully shape up our brows. If you want to learn how to wax your eyebrows step by step, however, having this backup skill can prove to be an asset to you and your brows.
With that said, we've put together an all-inclusive post that will carry you along your own eyebrow waxing journey and educate you on the best products to help you along the way.
READ: Eyebrow Waxing vs. Threading: Complete Guide for Beginners
Waxing Eyebrows at Home
Waxing eyebrows at home should only be done when you really know what you’re doing. If you’re just starting out, try visiting a professional first to get a visual of the process and how everything works.
After getting a feel for how things work, you should try out the process for yourself without attempting hair removal at first.
Measure your brows accordingly to make sure their placement is correct and that the shape you’d wax in is flattering for your face shape and even. Once you’ve narrowed down your shape, and what works for you, apply the wax outside your drawn border. It’s alright to go in with a tweezer to catch any stray hairs you might have missed with your wax after the process.
READ: Why Learning About Eye Shapes Improves Your Eyebrow Game
How Do You Wax Your Eyebrows For Beginners?
As a beginner, waxing your eyebrows should include six main things:
- Cleansing
- Measuring the brows
- Trimming
- Waxing
- Tweezing
-
Post-care
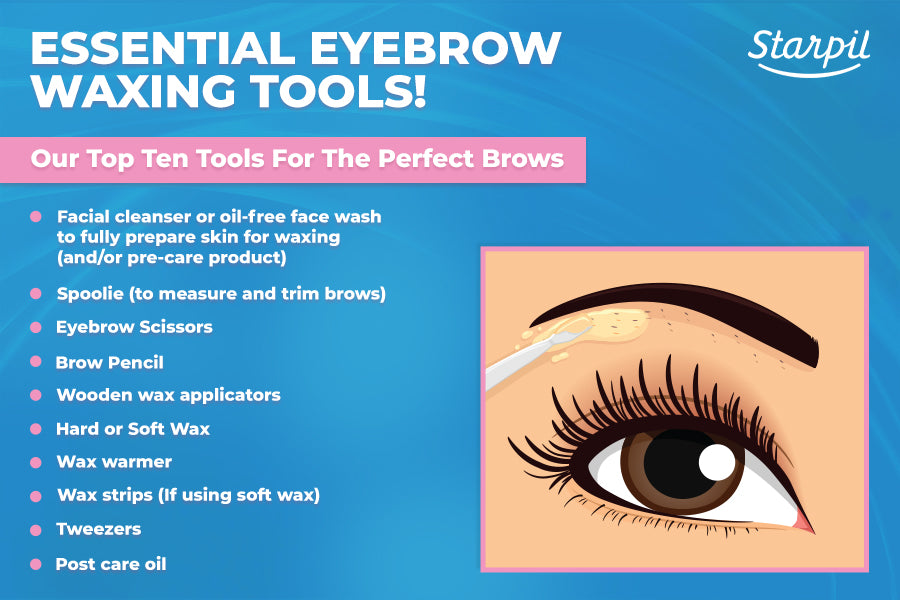
It's very important to have all the tools necessary in your home and ready to be used before you dive in. No one wants to realize they're out of wax strips AFTER they apply the wax.
We're here to help you avoid minor disasters like those. So, here is our list of things needed to get you started:
Looking for these quality products to wax your brows with? We’ve got just what you need for the perfect eyebrow wax.
Eyebrow Waxing Kit
For our humble self-waxing beginners, Starpil has got your back! We have conveniently designed waxing kits just for you. They contain an assortment of items to fulfill your eyebrow waxing needs - no matter what they may be.
This kit is geared towards those waxing their own eyebrows, lips, or facial hair in general.

It contains BOTH the 4.5 and 6 in wooden wax applicators, a pre and post-wax care bundle (with three options to choose from), a wax warmer designed for hard wax, AND your choice of hard wax (pink, blue, or black beads, blue film tablets, or our ultra-sensitive Starsoft tablets.)
This one kit has knocked off 5 out of your ten needed items! (Actually, only nine items are required if you are using hard wax- you won't need wax strips.) Plus, the amount you receive will last an exceptionally long time if you're only using it to tackle your brows.
- Angled Wooden Brow Spatulas: These spatulas allow for extreme precision, and are perfect for waxing eyebrows.
So, you've gathered your tools, and you're ready to embark on an eyebrow waxing journey. What are your next steps?
READ: How to Choose an Eyebrow Waxing Kit

What Are The Steps For Waxing Eyebrows?
STEP 1: Heat Your Wax
Whether you choose soft or hard wax, put your wax into the warmer and turn it on, giving it ample time to warm up.
We want honey-like consistency, so once your wax has fully melted, you may need to drop the temperature down on your warmer a tad to reach this honey-thick texture.
STEP 2: Cleansing
While your wax is warming, cleanse your entire face of any makeup and oils. Having excess makeup or debris on the face can prevent wax from fully adhering to the hair. Having a clean, smooth surface will work best.

The pre-wax gel included within your bundle in the kits mentioned above is going to be used now. Apply the gel with a cotton pad all over your brows and the skin between and around your brows (essentially everywhere you will be waxing). This step gives an added layer of cleansing to prep your skin, ensuring a good wax, and can help prevent some irritation and post-wax pimples.
STEP 3: Trim Your Brows
Using your spoolie, brush all the hairs on your brows in an upward fashion. Use your scissors to trim the longer hairs to give a uniform length.
Take just one small area of hair and trim. Remember, you don't want blotchy or patchy trimming, so don't go crazy and cut all your hair at the same time! You can even do each hair at a time.
Always trim in the direction of the brows and never down into the brows!

Always trim in the direction of the brows and never down into the brows!
STEP 4: Measure Your Brows
Measuring and outlining the shape of your brows isn't as intimidating as it seems, and we promise it will get much easier the more you do it!
We're following a guide called "The Golden Ratio," which essentially provides help in shaping brows according to your own facial landmarks.
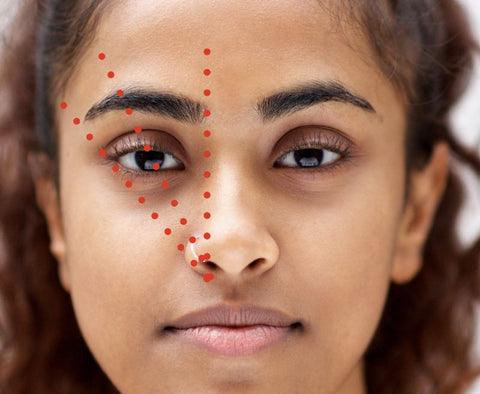
First, use one of your wooden applicators and align it with the center of your nostril, going straight up to the start of your brow. This should be where your brow hairs begin. You can use your brow pencil to mark this line to know how much hair should be waxed off or if it doesn't even need to be touched.
Next, we want to find where our brow stops. Using the same landmark at the middle of your nostril, move the wooden applicator underneath the corner of your eye to the end of your brow. This is where the tail should end.
Lastly, to find your arch, keep the applicator in the same starting point of your nostril and position it right through the middle of your iris when looking straight ahead. Where the applicator hits the brow, this is your arch.
Here’s a resource on eyebrow shapes to improve your brow game.
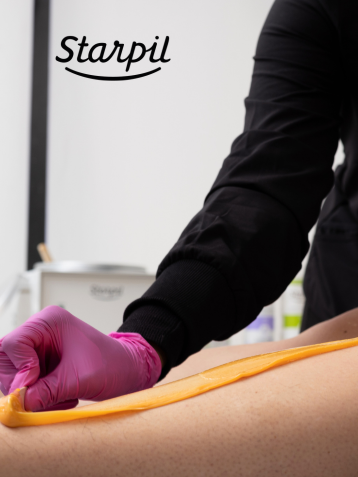
STEP 5: Apply Your Wax
To begin, use a small amount of wax and apply the wax under your eyebrow around the area you have mapped out. You can take off more hair, you can't add it back, so be sparse in the beginning until you feel comfortable.

Apply your soft or hard wax in the direction of the hair growth, and always pull the wax off in the opposite direction of how your hair grows.
STEP 6: Tweeze And Touch Up
Once you have fully waxed the bottom, in between, and above your brows, use tweezers to pluck any stray hairs that are leftover from waxing.

Remember, only pluck one hair at a time and assess the shape and evenness of your brow in comparison to the other side after almost every pluck to keep things matching well.
STEP 7: Apply Post-Care Waxing Lotion/Gel/Oil
Whichever product you choose in your wax kit for your post-wax bundle, apply it on a clean cotton swab all over the areas you have waxed to cleanse and soothe the area.
There you have it! Your guide on how to wax eyebrows step by step isn't so intimidating anymore, and we hope you've gained the confidence we know you have to get out there and try it!
READ: Waxing at Home: The Complete Beginner’s Guide
How To Wax Eyebrows with Soft Wax
**NOTE: In addition to all the steps mentioned above, the only difference you need to consider is applying wax strips after soft wax application.

Be sure to press down to adhere the strip to the wax, but don't press so hard that the wax pushes outward and attaches to hairs you did not want!
READ:How to Wax Step-by-Step.
Eyebrow Waxing Tips
Whether you’re learning how to wax eyebrows with hard wax or soft wax, the challenge is to apply far enough away from the brow to avoid wax spreading on the parts of the brow you want to keep, yet close enough to get all of the hairs you do want to remove.
If you have to mark the brow with a pencil, there is no shame in that game to give yourself a border. Using a smaller, angled waxing spatula helps with this.
Practice makes perfect. To get good at waxing eyebrows, grab any willing participant, advertise on social media for models, or offer the service for free to your body waxing clients if you're new to the brow game.
Most importantly, start analyzing the good and the bad brows that you see. Are they symmetrical, do they enhance the face or overwhelm it, are they parallel from top to bottom, etc.
In the end, it's up to your or your client’s needs, but if you have the skills to pay the bills, you'll be able to learn how to wax eyebrows so that clients keep coming back!
How to Prevent Pimples After Waxing Eyebrows
To prevent breakouts and pimples after waxing eyebrows, be sure to use the right pre and post-wax care on skin. It’s okay to continue using post-wax care even three days after waxing. Gently exfoliate the skin 24 hours after waxing and avoid going to the gym, performing activities that might cause chafing or irritation, and avoiding extreme sun exposure.
Keep bangs or hats off the area and if you’re acne-prone, avoid foods high in sugar or fats and keep the skin protected with moisturizers that contain antibacterial and anti-inflammatory ingredients.
How to Treat a Wax Burn on Eyebrows
At first, a burn or skin lifting may appear as redness, but if the border of it is defined and the area looks a little wet, it may be a burn from using low-quality wax, the wax being too hot, or using the wrong wax for the skin type.
As soon as you see a wax burn, cool the skin with water or a wet cold compress and leave it on the skin. Don’t try to go over it with more wax, let it heal before waxing again. 100% pure aloe vera gel, and Neosporin are great tricks to use throughout the day until the burn is gone. Avoid wearing, but do use sun protection to reduce pigmentation.
READ: The Complete Guide to Waxing Facial Hair
Final Thoughts
Waxing your eyebrows at home can seem daunting for beginners, and rightfully so! No one wants crazy-shaped or overly thinned-out brows.

However, our clear-cut step-by-step guide on how to wax your brows is a surefire way to get you started and become more and more confident to embark on your waxing journey.
On top of using these fantastic steps, our eyebrow waxing kits have the high-quality essentials you need to begin and give you lots of options to fit your individual needs. Grab your kit and make sure to follow the instructions on your bag and warmer for proper warming and procedure. Now that you’ve got the right products and technique, you’re all set up to know how to wax eyebrows!
Comments